
The Basics of Design
Design is the first step in the process of creating an arcade controller. Here, several tools will be needed. The basic tools of design differ for 2D and 3D, but the principles will remain the same. In some cases, even the programs will remain the same. The tools used here include:
- Pen and Paper
- Autodesk Inventor 2016 (or any other CAD program)
The specifics of each Computer Aided Design (CAD) program differ from each producer. If you are not familiar with your program of choice, you should first try some tutorials for your program.
The Basic Parts
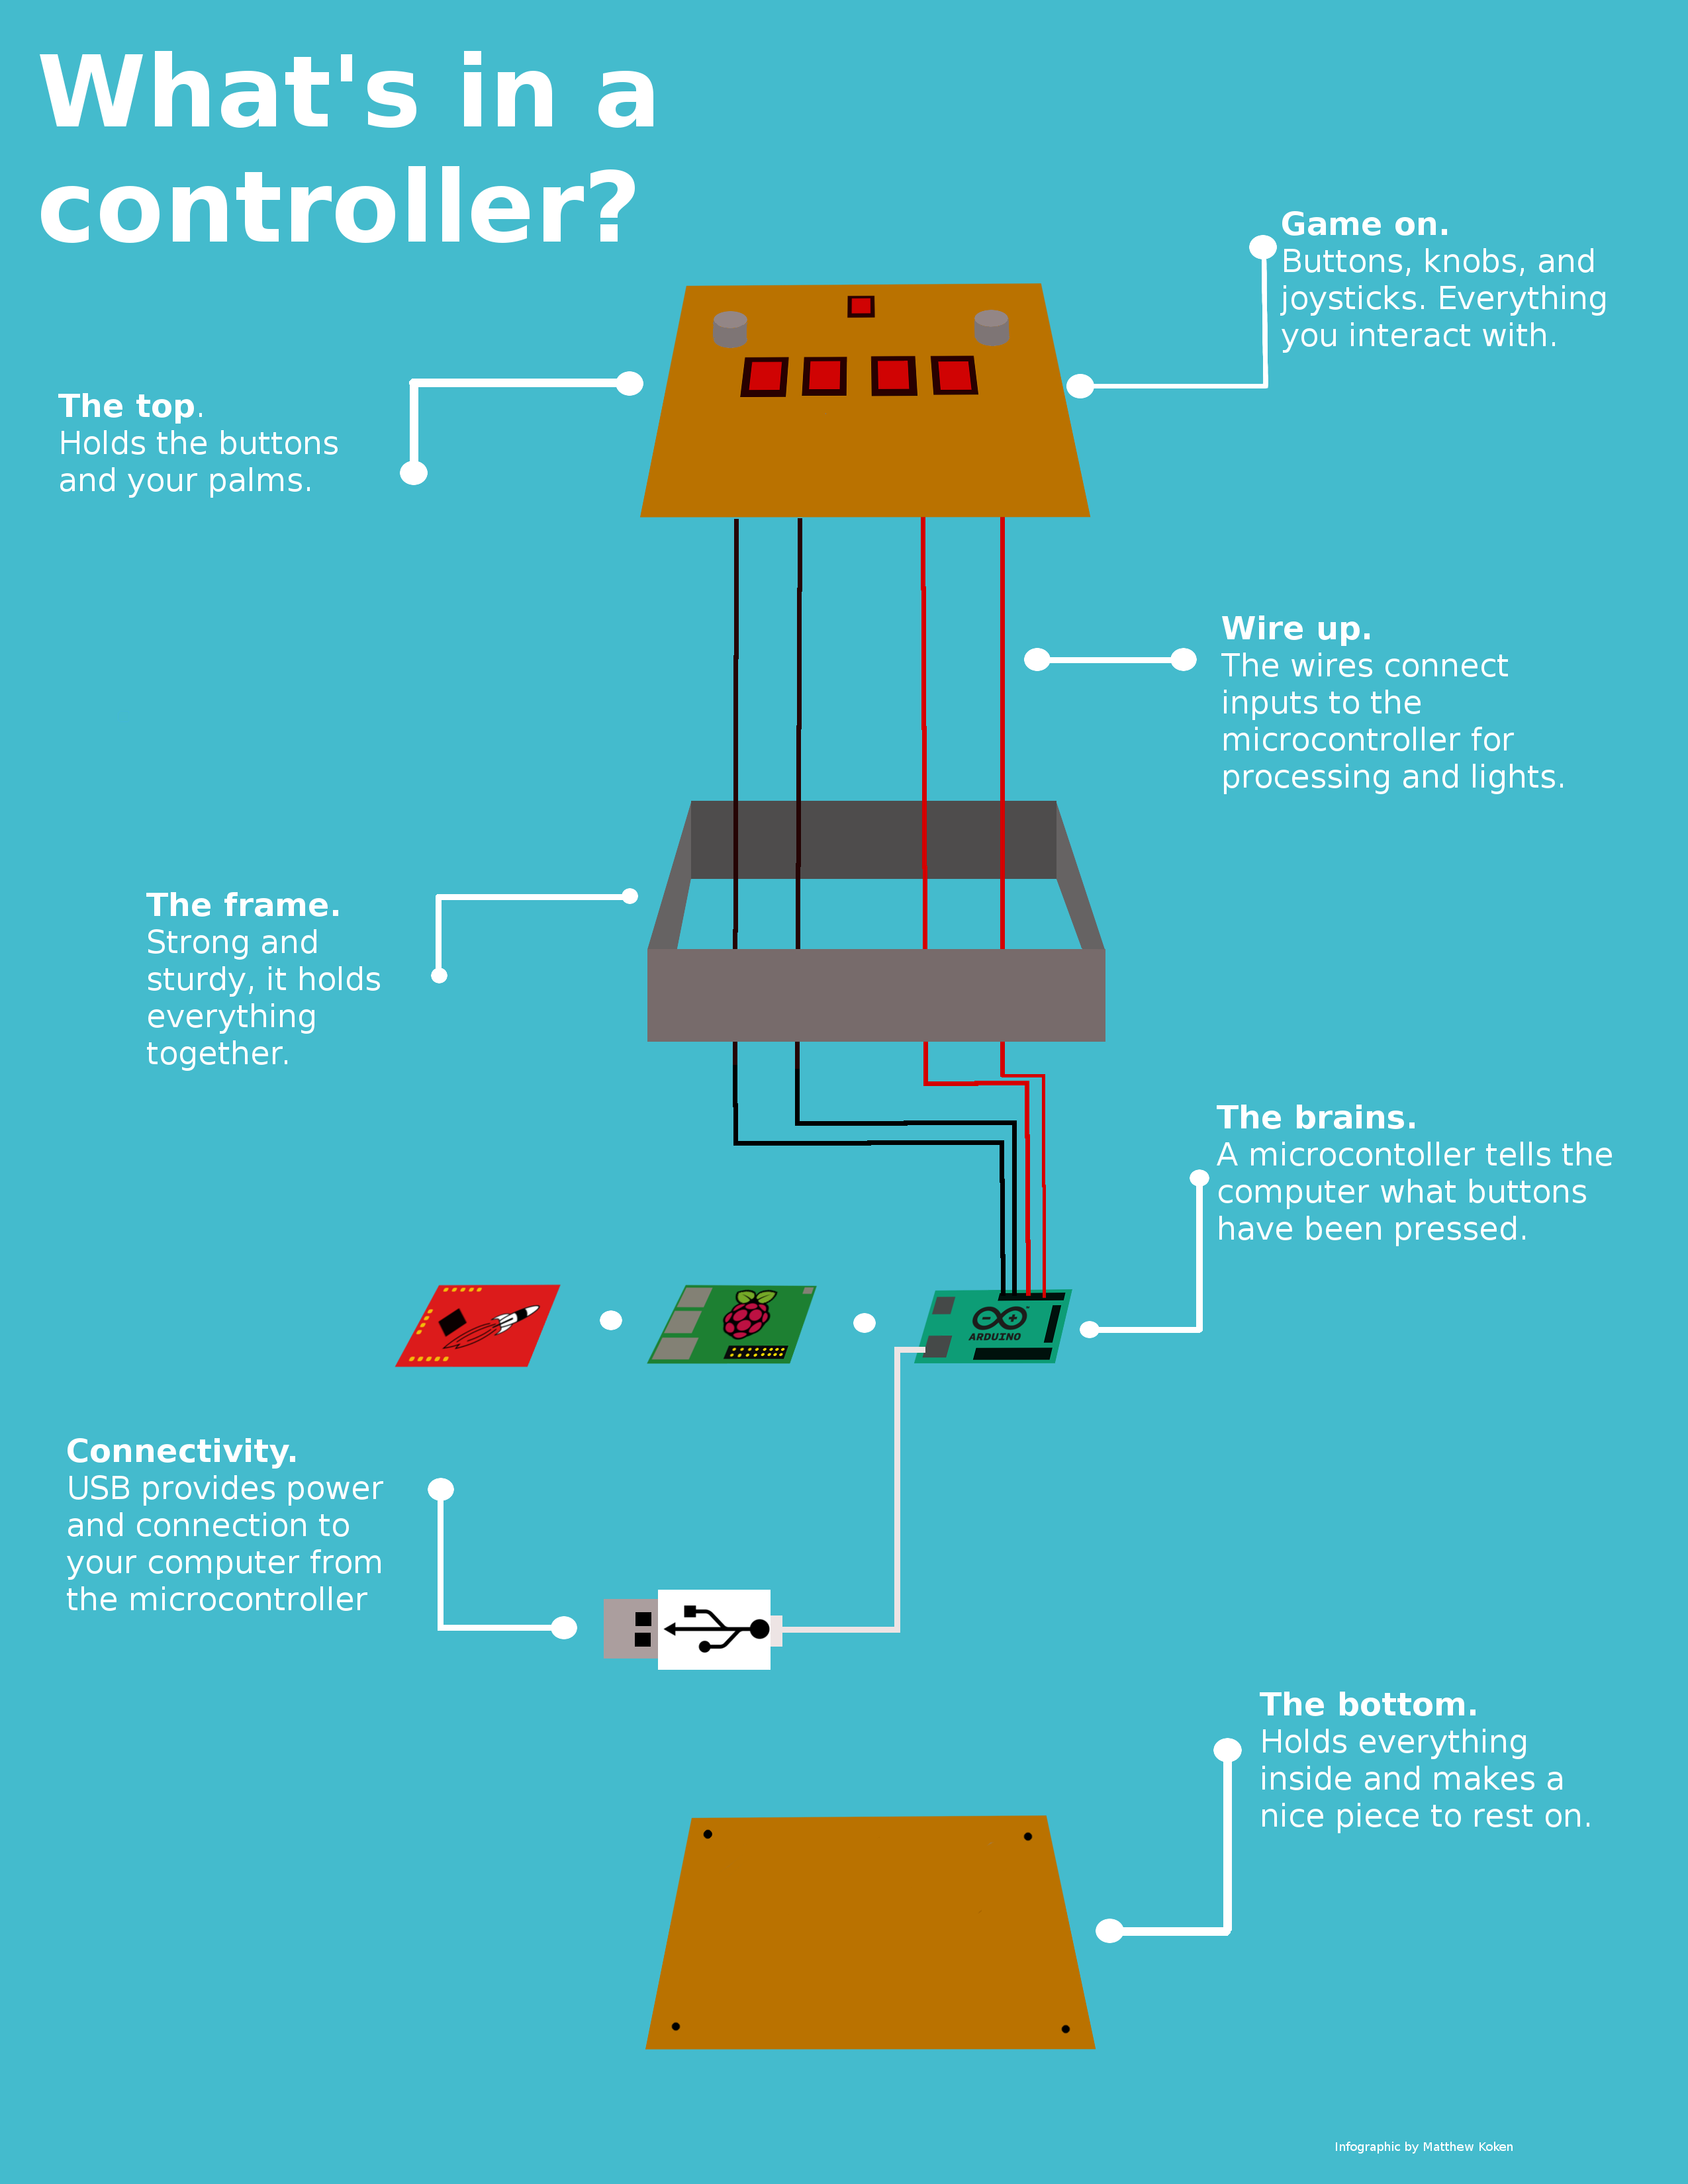
Before you can even begin designing something, you need to know what you need to design. A large project may seem impossible to tackle at first so breaking it down into major components will be necessary. Combining the components again should provide a clearer picture of the final project.
What is an arcade controller? It has buttons, knobs, joysticks, connections to a computer, etc. The controller probably has something you rest it on, something holding the buttons, and something holding the whole controller together. From that, we can start breaking it down into smaller, more manageable pieces. An arcade controller will have three main components:
- The Top Plate
- The Frame
- The Bottom Plate
The Top Plate
The top plate is the part of the controller you will be interacting with. This plate, or possibly a few plates hold the buttons for your controller. Many different materials may be used but thin wood or acrylic are preferred. Wood and acrylic are easily cut and are sturdy, providing support for the buttons and other components. A sturdy top is important for the longevity of your controller, as intense play may damage weaker materials like cardboard.
The Frame
The frame is the main body of the controller. The top and bottom plates will be attached to the frame, so it must be thick enough for screws or glue to hold it together. Again, sturdy materials are preferred here. The frame will hold all of the electronic components inside, so it must be tall enough to keep everything inside. A metal frame is strong and light but harder to work with. Shorts with exposed wires is also another potential issue if a metal frame is not properly coated inside.
The Bottom Plate
The bottom plate holds everything inside from below. This is what you will be resting on a table, your lap, or wherever you have your controller. Typically the same material as the top plate will be fine. Keep in mind that permanent attachments to the frame will make it difficult to access the electronics inside a controller after assembly. Keeping at least the top or bottom plate easily removable is highly recommmended.
Where To Begin
Now that the main components of the controller have been identified, a rough idea of the final product can be made. Start drawing out each component of the controller - the top, frame, and bottom - on paper or another drawing program. These are just sketches to capture the initial idea. You may continue to refine your ideas and sketches as you prepare to finalize the design of your controller. Combining the components together will provide a more complete view of what you will be making.
Next Steps
At this point, you should have a good idea of what your controller will look like. You’re ready to begin the next steps: buying the components and finalizing the design.